Assign a Transport to an Email
- Open the email edit screen in Mautic.
- Find the “Transport” dropdown.
- Pick the transport you want for this email.
- Save the email.
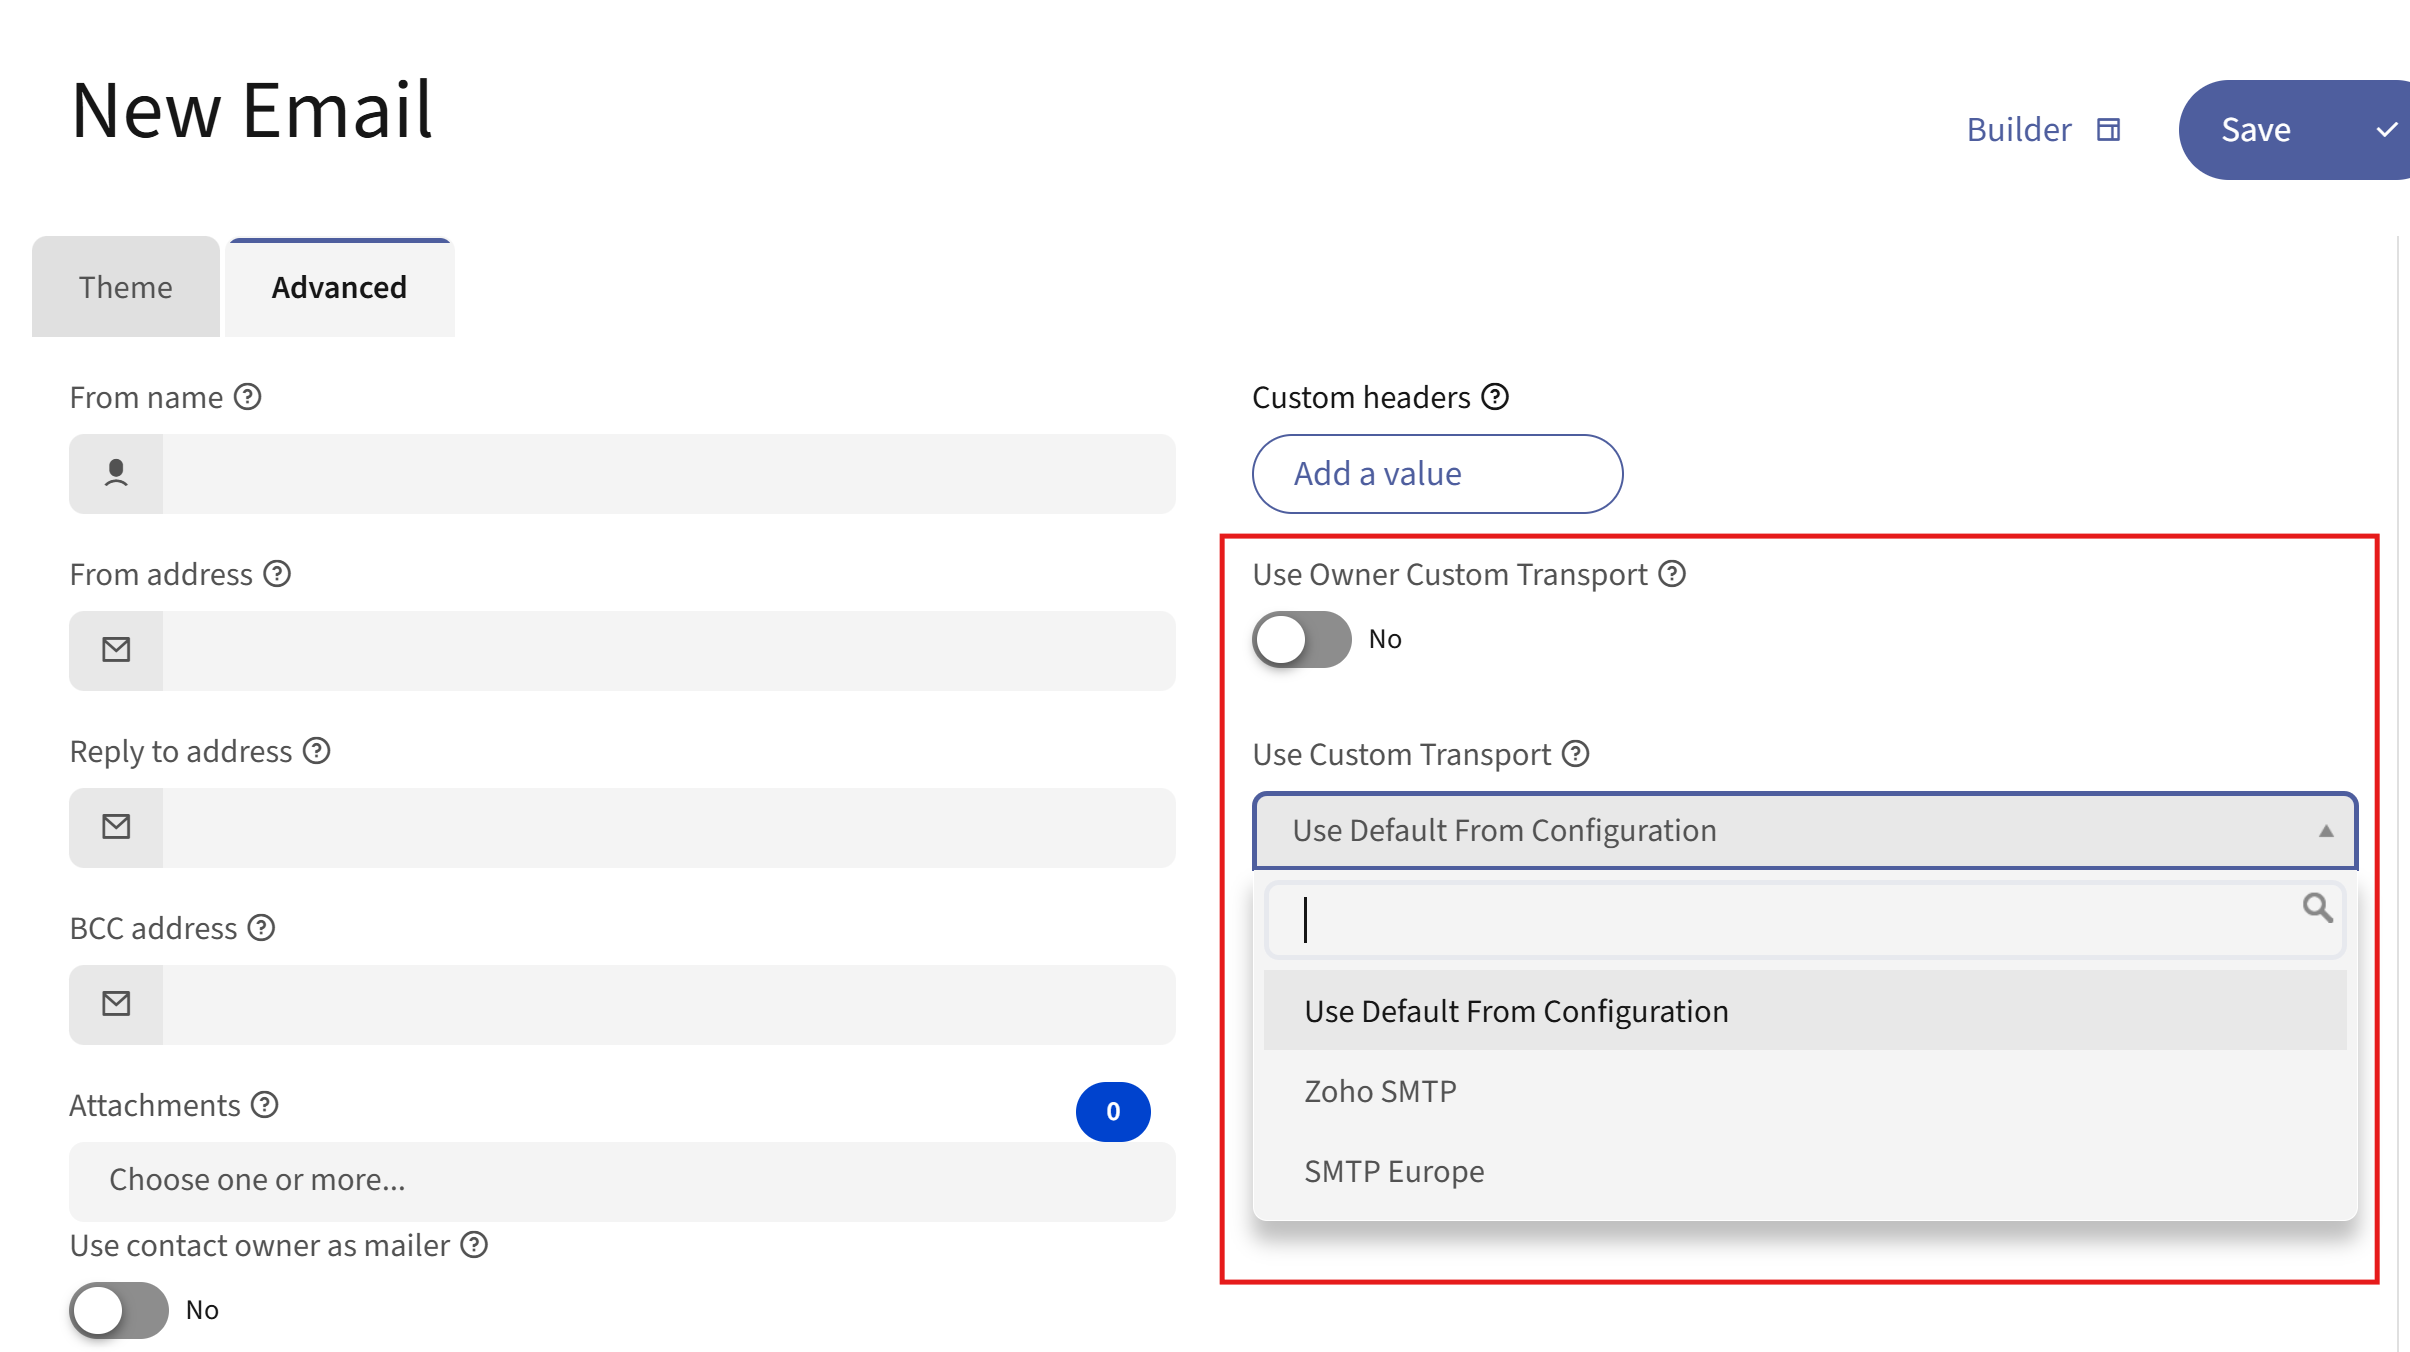
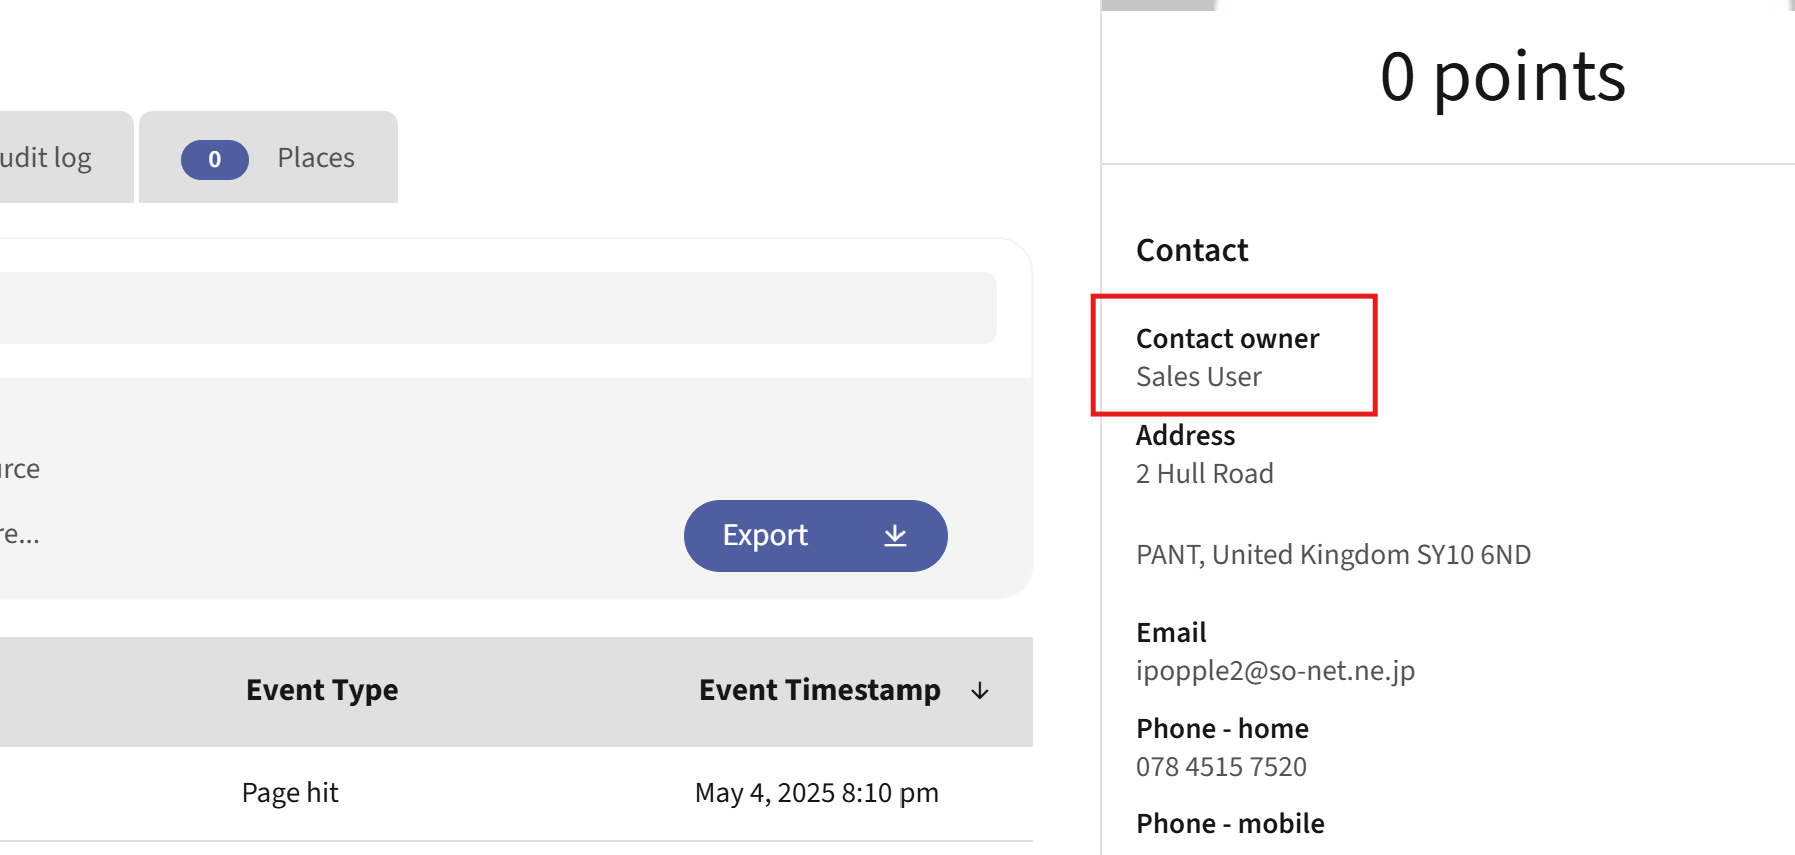
Use Contact Owner's Transport
- In the email edit screen, turn on “Use Owner Custom Transport”.
- The email will use the transport set for the contact’s owner (user).
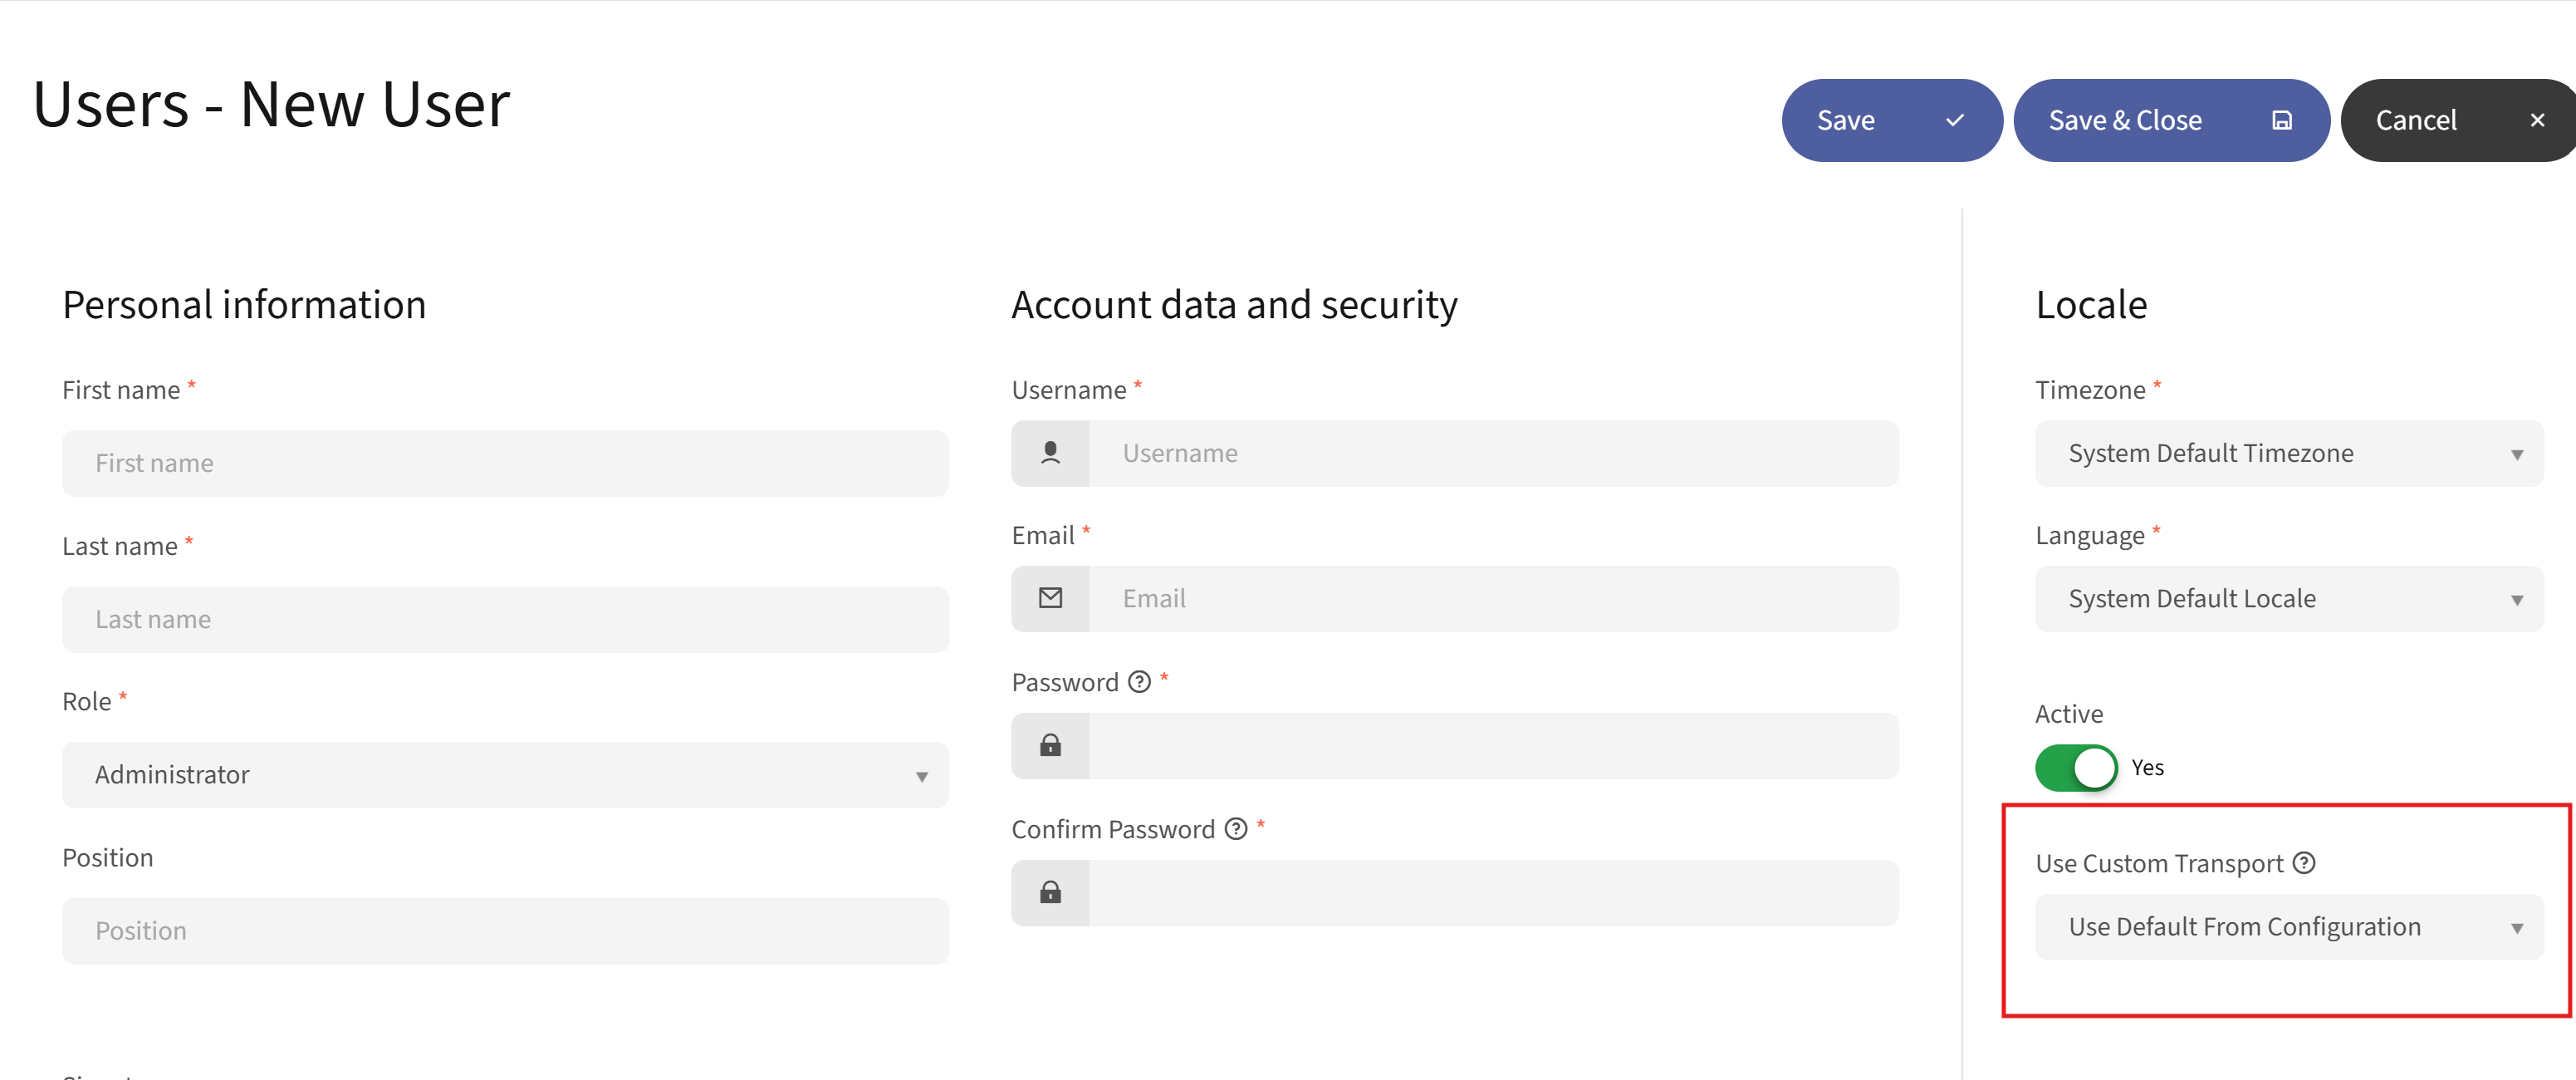
Assign a Transport to a User
- Go to the user profile edit screen.
- Find the “Transport” dropdown.
- Pick the transport for this user.
- Save the user.
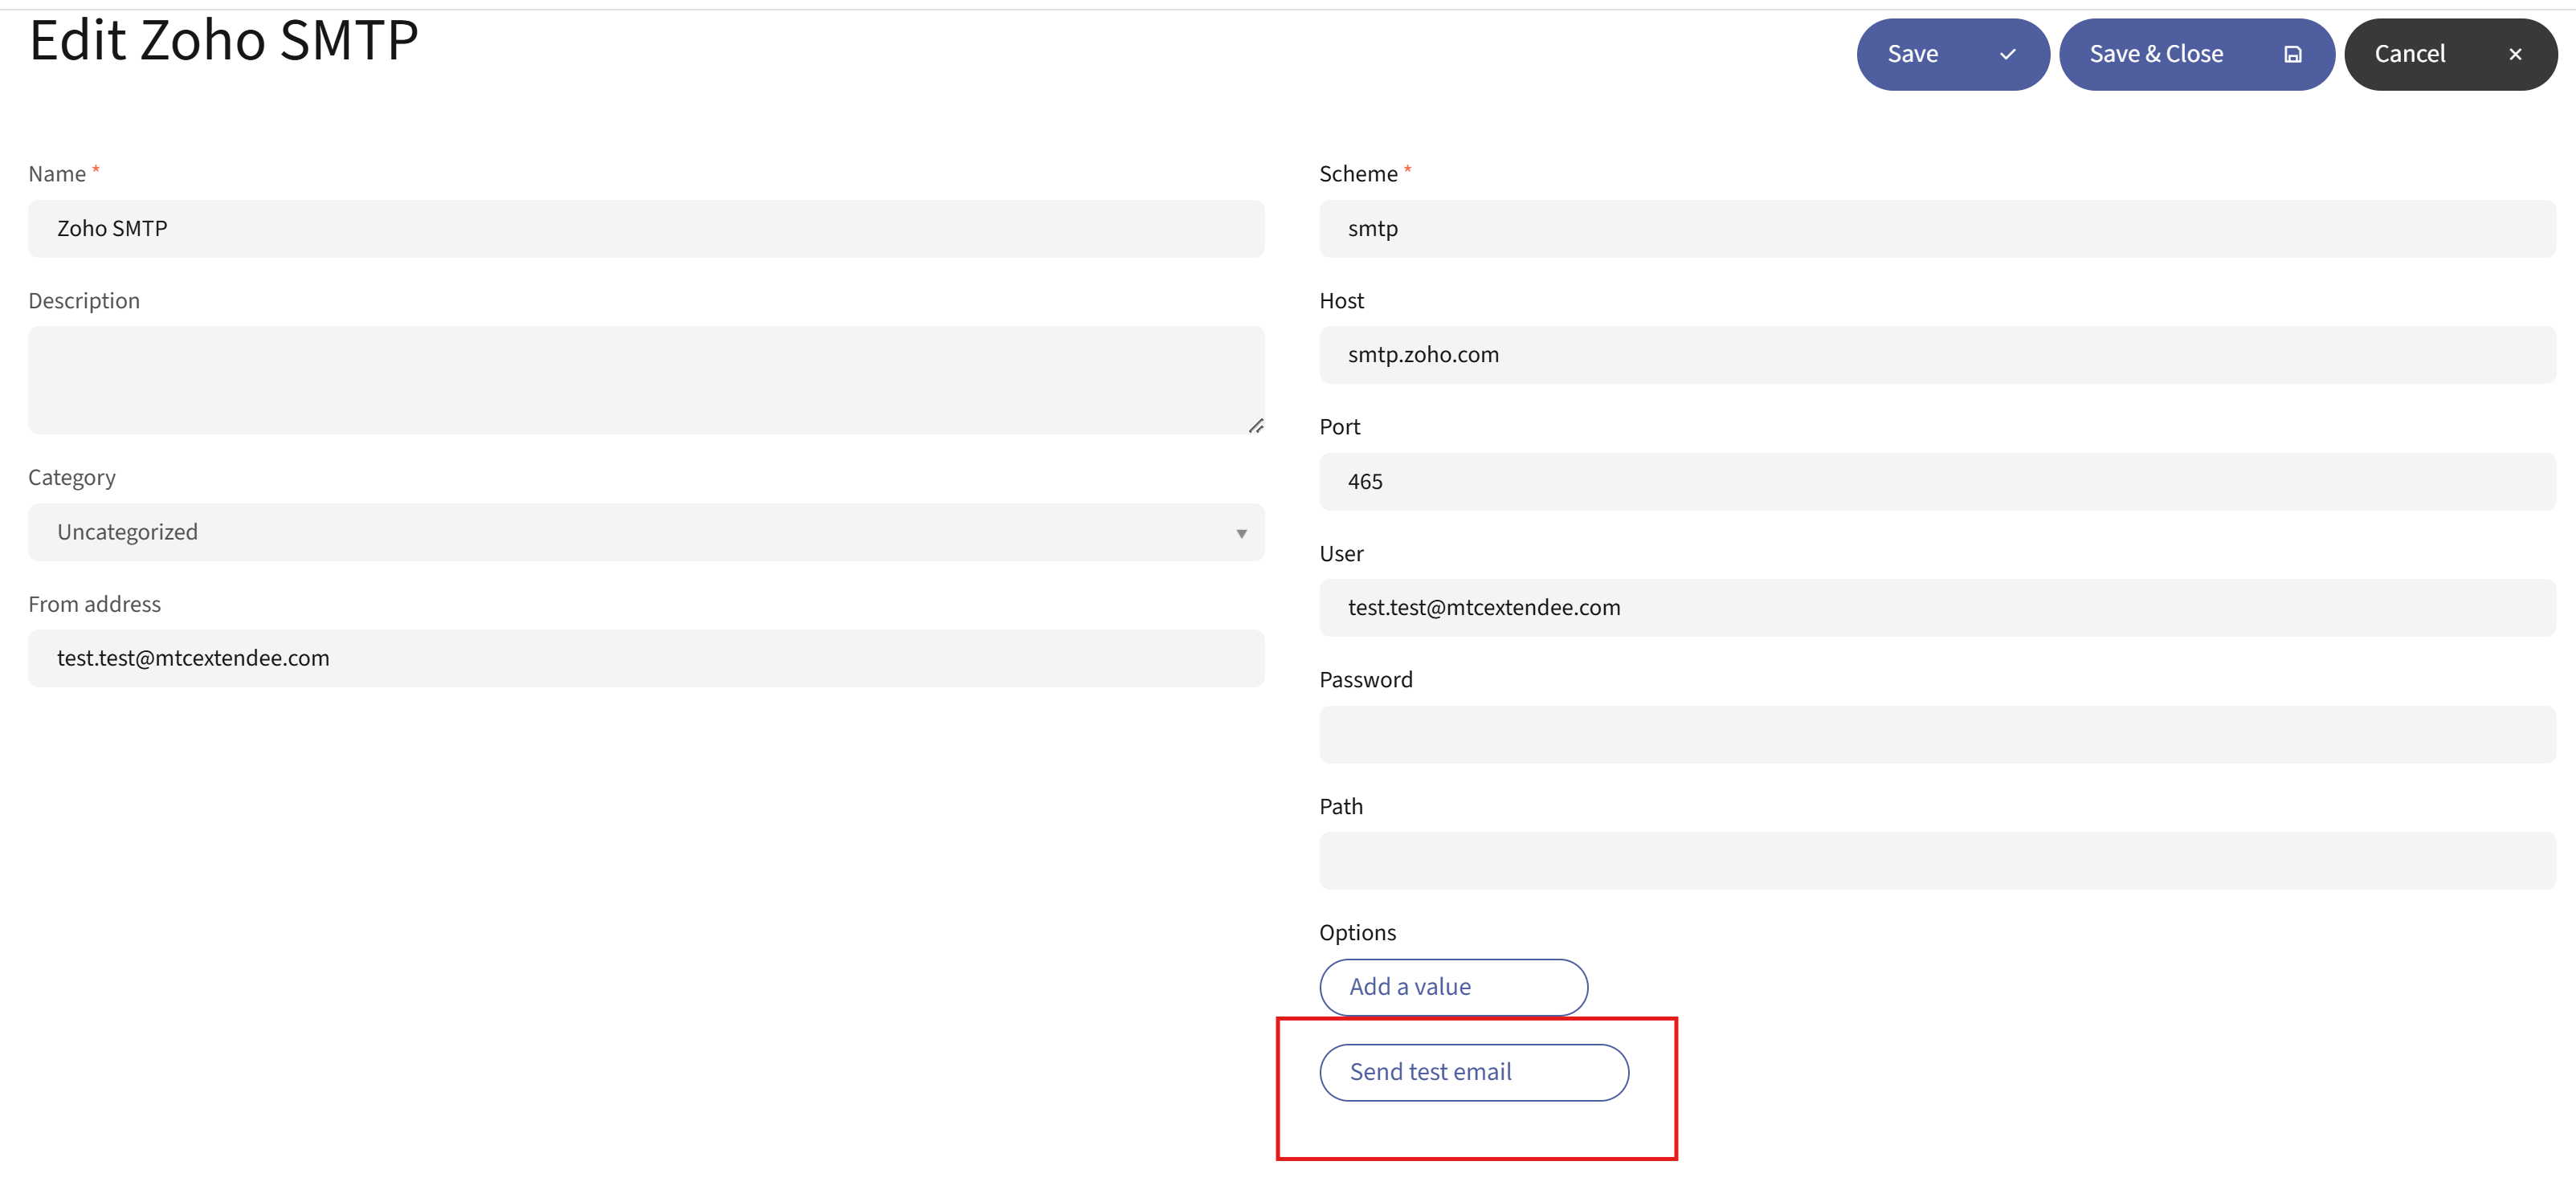
Add or Edit Transports
- Go to the “Multiple Transport” section in the Mautic admin menu.
- Click “New” to add a transport, or edit an existing one.
- Fill in the details (name, DSN, etc).
- Save.
Remove or Reset a Transport
- To remove a transport from an email or user, set the dropdown to blank and save.
- If no transport is set, Mautic will use the default transport.
If a transport is not working, double-check the DSN and credentials.
If changes are not applied, clear the Mautic cache.
Make sure you have permission to manage transports.
If changes are not applied, clear the Mautic cache.
Make sure you have permission to manage transports.